3D Printing vs. CNC Machining: When to Switch to Bridge Production
The real cost, tolerance, and material numbers that decide when it actually pays to move from the printer to a CNC mill.
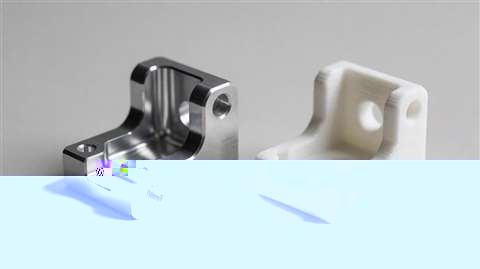
3D printing and CNC machining both compete for the same slot — bridge production, between prototype and full tooling. Here are the real crossover points on cost, tolerance, and material, not the ideological choice between "agile" and "expensive."
Why This Decision Gets Made Too Late (or Too Early)
Bridge production sits between prototyping and full tooling — a run of anywhere from a handful to a few hundred parts, made to production-intent tolerance and material, without the six-figure cost and lead time of a hard tool. 3D printing and CNC machining both compete for that slot, and the right answer depends on quantity, geometry, tolerance, and material — never just one of those in isolation.
The failure mode in both directions is expensive. Stay on the printer too long and you're paying labor to hand-finish parts that a machine shop would deliver inspection-ready. Jump to CNC too early — before the design is locked — and you're paying programming and fixturing costs on a geometry that's about to change after the next round of testing. The framework below is the one I actually use to time that switch.
The Real Cost Crossover — Where the Math Actually Flips
Plastic parts: the 8–12 unit crossover. For simple plastic geometry, the crossover where CNC's total cost drops below printing's typically lands around 8–12 parts. Below that, a printer's near-zero setup cost wins outright — you're paying $20–50 in material and machine time per iteration with same-day turnaround, and a CAM program plus workholding for a single-digit batch rarely pencils out. Above roughly a dozen units, CNC's fixed setup cost (programming, fixturing, first-article) gets amortized across enough parts that its lower marginal cost per unit takes over, even though a single machined part quoted alone often looks like $100–500 against a $20–50 printed one. The number moves with part complexity — a part needing five machine setups and custom fixturing pushes the crossover higher; a simple prismatic part machinable in one setup pushes it lower. Run the actual quote at your specific quantity before assuming either direction.
Metal parts: CNC wins from part one. For metal, there usually isn't a crossover to calculate. Metal 3D printing (DMLS/SLS metal) carries powder, machine time, and post-processing costs that put it well above CNC billet machining even at a quantity of one, unless the geometry has internal channels, lattices, or organic forms that are physically impossible to machine. If the part is a solid or near-solid metal component with no exotic internal geometry, CNC is the default from the first unit — not just the cheaper option at volume.
The hidden cost most people miss: post-processing labor. The comparison people get wrong most often is quoting the raw part cost and stopping there. An SLS or DMLS part quoted at $180 often needs another $60–90 in post-processing labor — support removal, sanding, hole correction — before it's dimensionally usable. A CNC part quoted at $280 typically arrives ready for inspection with no hidden labor line. Compare landed cost, not quoted cost, or the printed option will look artificially cheap on paper.
Tolerance and Material Constraints That Override the Cost Math
Sometimes the unit-cost math doesn't matter, because the part's requirements rule out one process regardless of price.
When tolerance alone forces the decision. A well-tuned consumer FDM printer holds roughly ±0.1–0.3mm on a good day — the same range that shows up in our FDM part-preparation checklist and the clearance numbers behind snap-fit and press-fit design. A 3-axis CNC mill routinely holds ±0.02–0.05mm without heroics. If a mating feature needs to hold tighter than about ±0.1mm consistently across a batch — a bearing bore, a precision shaft fit, anything that has to interchange with a part made elsewhere — no amount of slicer tuning gets a printer there reliably. That's a tolerance floor, not a cost tradeoff, and it forces CNC regardless of how few units you need.
Engineering-grade materials 3D printing can't match. The other override is material. Machined 6061 aluminum, stainless steel, Delrin (POM), and PEEK all have fatigue, chemical, and thermal properties that printed PLA, PETG, ABS, or nylon simply don't reach. If the part's spec calls for one of those materials by name — because it's going into a real assembly, outdoors, or under sustained load — the process decision is already made before you look at a single cost number. In that case, print a form-check prototype if you need one, but plan the functional run in the actual spec material from the start.
Lead Time Tradeoffs
Printing wins on speed almost every time — same-day to next-day for a single part or small batch, with no queue to wait on. CNC bridge production typically runs 3–7 days depending on shop queue, programming complexity, and material lead time, which is still far faster than the 4–8 weeks a hard injection tool takes to cut (a jump I cover in more detail in designing prototypes that survive the move to injection molding). If you need a part tomorrow, that alone can override the unit-count and tolerance math — print it, accept the tradeoff, and revisit the process decision for the next batch.
A Practical Decision Framework
Here's the rule of thumb I actually apply, roughly in this order:
Need it in the next 24–48 hours, or need fewer than ~10 simple plastic parts?
Print. The setup cost of machining doesn't pencil out yet.
Any part in metal, or a plastic run past roughly a dozen units?
Default to CNC bridge production and get an actual quote — the fixed setup cost is now working in your favor.
Any mating feature tighter than about ±0.1mm, or a spec that names an engineering-grade material?
CNC, regardless of quantity or the cost math above. This is a hard requirement, not a preference.
Geometry with internal lattices, undercuts, or organic forms a mill physically can't reach?
Print, and budget for the labor or duty-cycle limits that come with it — there's no CNC alternative for that geometry at any price.
Blending Both on Mixed Projects
In practice, most projects I run aren't a single decision — they're a sequence. I validate form and fit cheaply on the printer first, iterating through two or three geometry revisions before locking anything down. Once the design is stable, the parts that clear the thresholds above — quantity, tolerance, or material — move to a CNC bridge run, while I keep printing the jigs, fixtures, and spare brackets that support that run. The printer and the mill aren't competing for the same job; they're doing two different jobs on the same project, and the framework above is just about being deliberate about which part goes where instead of defaulting to whichever machine is already warmed up.
If you're sitting on a design that's outgrown the printer, or trying to figure out where your specific part actually lands on this cost curve, get in touch — a quick quote comparison against your real quantity and tolerance is usually enough to settle it.
Sources referenced: Hubs/Protolabs Network on 3D printing vs. CNC machining, Cad Crowd on CNC vs. 3D printing cost insights.
Need help with your 3D print?
The Makehasdai team prepares and prints your files — FDM, SLA and SLS. Shipping across Italy in 2–5 working days.